
Add Statcounter Code To WordPress To Track Users Visits etc.
There are different ways you can add StatCounter code to WordPress if you want to track users visits and more. You can add the code directly into your theme file, you can make use of the StatCounter WordPress plugin and you can also make use of third-party plugins eg Insert Headers and Footers plugin.
To get started, you will need to add your WordPress blog to StatCounter after which you will see the code which you will install on the WordPress blog.
So, let’s get started.
Go to www.statcounter.com
Log in or sign up for a new account if you are not yet registered.
After you sign in, click on “Add Project“. Thereafter, you will see the form below :
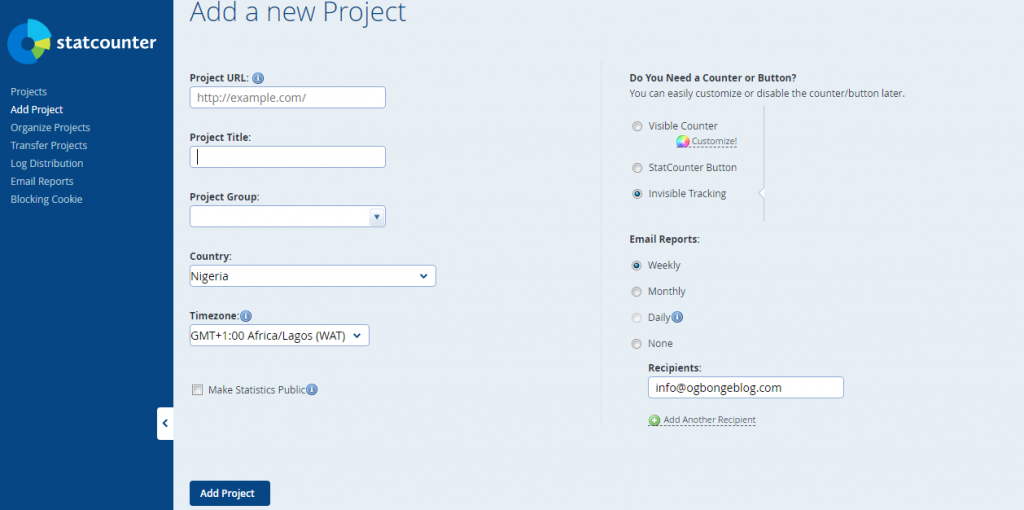
Enter your blog URL in the “project URL” field, give it a title, select “invisible tracking” and click “Add Project” button.
You will be redirected to the page below :

Click on “continue to default installation”
Thereafter, you will see the code which you will add to your WordPress blog. Save it somewhere e.g on a notepad.
Open a new tab on your web browser and sign in to your WordPress dashboard.
Go to “Plugins” > “Add New”
Search for “Insert Headers and Footers”
Click “Install Now” as seen in the screenshot below :
[caption id="" align="alignleft" width="1024"] Add Statcounter Code To WordPress To Track Users Visits etc.[/caption]
Activate the plugin after installation
Thereafter, go to “Settings” > “Insert Headers and Footers”
Paste the StatCounter code in the “scripts in footer” box
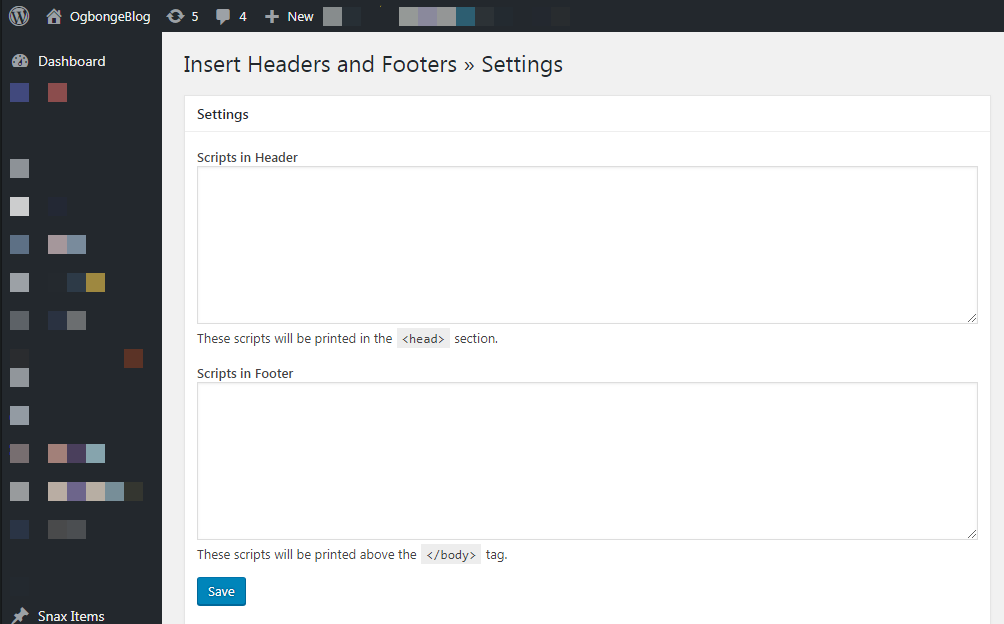
Click “Save”
Go back to the StatCounter page and verify the installation. – Very Important!
If successful, statcounter.com will start tracking your blog traffic and you can always sign in there anytime to check your blog pageviews etc
To get started, you will need to add your WordPress blog to StatCounter after which you will see the code which you will install on the WordPress blog.
So, let’s get started.
Go to www.statcounter.com
Log in or sign up for a new account if you are not yet registered.
After you sign in, click on “Add Project“. Thereafter, you will see the form below :
Enter your blog URL in the “project URL” field, give it a title, select “invisible tracking” and click “Add Project” button.
You will be redirected to the page below :
Click on “continue to default installation”
Thereafter, you will see the code which you will add to your WordPress blog. Save it somewhere e.g on a notepad.
Open a new tab on your web browser and sign in to your WordPress dashboard.
Go to “Plugins” > “Add New”
Search for “Insert Headers and Footers”
Click “Install Now” as seen in the screenshot below :
[caption id="" align="alignleft" width="1024"]
Add Statcounter Code To WordPress To Track Users Visits etc.[/caption]Activate the plugin after installation
Thereafter, go to “Settings” > “Insert Headers and Footers”
Paste the StatCounter code in the “scripts in footer” box
Click “Save”
Go back to the StatCounter page and verify the installation. – Very Important!
If successful, statcounter.com will start tracking your blog traffic and you can always sign in there anytime to check your blog pageviews etc